Understanding the Hot Standby in S-Series
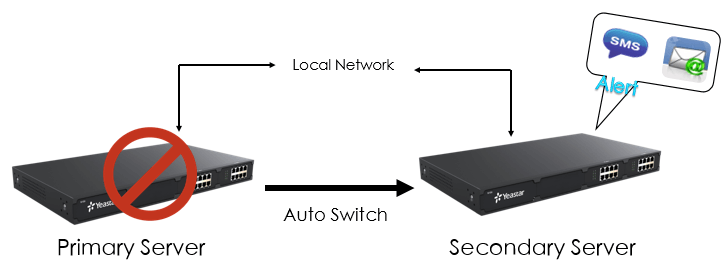
Hot-Standby or Hot Spare is a redundant method in which one server runs simultaneously with an identical primary server. And all data is mirrored to the secondary server in real time. Upon failure of the primary system (server), the hot standby system (server) immediately takes over, replacing the primary server.
Yeastar Hot Standby solution offers you the ability to provide high business phone system availability, helping to prevent unnecessary business loss caused by unexpected server failure. Two Yeastar S-Series VoIP PBX could be optimized for use as a failover system to provide rapid failover in the event of system failure.
You can set one S-Series VoIP PBX as a primary server, set another S-Series PBX as a secondary server (the backup system). Once the active server failure is detected, all the telephony would be switched to the standby server automatically. Thus the downtime was kept to an absolute minimum to ensure the normal operation of all the functions for users. Callers still reach the people they need and business can continue as usual.
Besides, the solution also includes a failover notification system for your prompt reaction. When the primary PBX is down, you could receive instant notification via email, call, or SMS notification when configured in the S-Series VoIP PBX event center.

Note: Hot standby feature is supported on S-Series firmware version 30.2.0.8 or later.
Precondition
The two servers in the failover pair must meet the following requirements:
- Same model.
- Same firmware version
- Same expansion boards and modules installed in the same slots
- Same software configurations
Quick Start
- Verify the basic information of the two S-Series PBXs.
- Edit the PBX hostname to verify the two S-Series PBXs
- Set up hot standby service for the two PBXs.
-
- Set IPPBX1 as a primary server.
- Set IPPBX2 as a secondary server.
- Reboot the two PBXs to make hot standby service take effect.
View the Configuration Guide about details of how to configure Hot-Standby on two S-Series PBXs. Or you can watch the video below to learn more about the feature and its configuration.


