


Have you ever been bothered about creating a large number of extensions one by one, along with their settings and provisioning on the PBX system? Have you ever wondered if it is possible to effortlessly export and import all the extensions at once with a CSV file? Yeastar P-Series Phone System and S-Series VoIP PBX allow you to easily achieve it and will help you save considerable time.
Yeastar PBX system highly speed up the process of the extension configuration.
- Export all your existing extensions to CSV file in seconds
- Modify anything on each extension and re-import them
- Create any number of extensions in a short time
- Backup all extensions configuration regularly
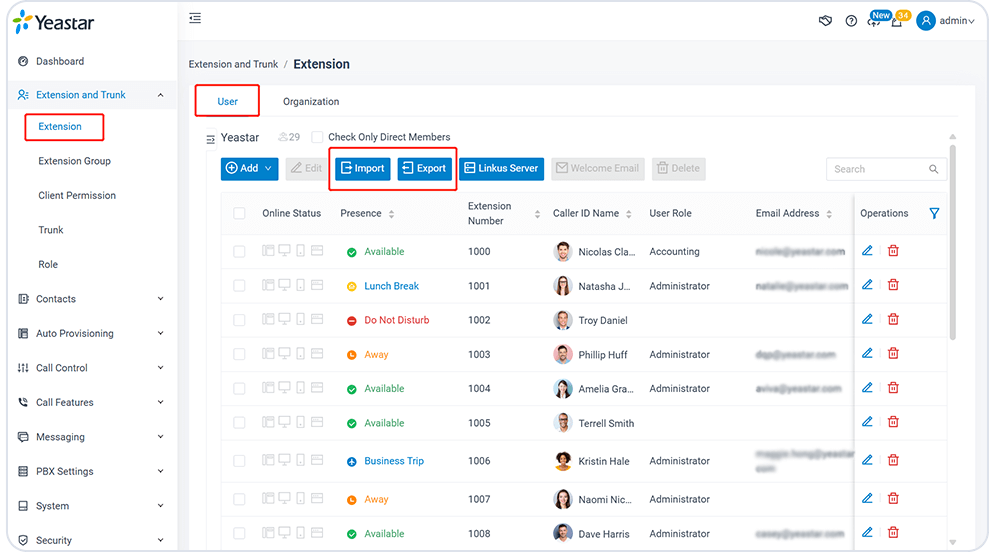
Importing and Exporting Extensions on P-Series PBX System
The SIP extensions configured on the Yeastar P-Series PBX System can be exported and saved as a template. You can fill in desired extension information in the exported file, and import the file to PBX again. If you have an organization tree for your extensions, you can also import and export extensions’ organization information. To import extensions, it’s recommended to start with exporting at least one extension created on your PBX so you can see the proper CSV format.
The configuration steps are as follows. For details, please refer to the administrator guide.
- Log in to the PBX management (administrator)
- Navigate to the Extension and Trunk > Extension Setting Page: Go to the PBX Extension Setting page.
Click the “Export” or “Import” button to download or import a CSV file containing your extension info. - In the CSV file, you can modify all extension configuration items such as name, registration passwords, organization, user role, and more. You can also add new entries or delete ones.
Exporting Extensions on S-Series VoIP PBX
- Click the “Export” button on the PBX Extension Setting page should allow you to download the CSV of all your current extensions.

Export Extensions on Yeastar S-Series VoIP PBX
- You can now open this file in a user-friendly CVS, like Microsoft Excel. All the detailed configuration information of each extension will be shown in the CVS file.
Importing Extensions
- You can import a new CSV file of extensions at any time. To do this, it is recommended to start with exporting at least one extension created on your PBX so you can see the proper CSV format.
- In the CSV file, you can edit the extension configuration, add new entries, and delete fields except for “type”, “username”, “registerpassword”, “loginpassword”. But if you don’t want to configure Registration Password and Login Password, the system will generate the passwords automatically. The last tip, don’t change the spelling of the name of the top row.
- Click the “Import” button to import extensions by choosing a CSV file from your local computer. Then click “Import” button when done.

Import Extension on Yeastar S-Series VoIP PBX
- If some extensions that you are importing already exist in the list, the old one will be automatically covered by the new one.
You might also be interested in:
- Easy-to-use P-Series PBX administrator features
- More extension configuration knowledge for Yeastar PBX System can be learned at our document center. You can also find more Yeastar PBX Configuration Video Tutorial on our YouTube channel here.